 |
16,000
btu Portable Ac's
14,000 btu Air Conditioner
Unit
14,000 btu AC With
Heater
13,000 btu Air Conditioners
12,000 btu Room Air Conditioner
12,000 btu AC With
Heater
12,000 btu AC Unit
(Manual)
12,000 btu
W/water Pump
11,000 btu Portable AC
10,000 btu AC Unit With
Heater
10,000 btu AC With Remote
10,000 btu AC (Manual)
9,000 btu AC Unit With
Remote
7500 btu Small Air Conditioners
|




|
|
EXAMPLE INSTALLATION GUIDE FOR PORTABLE AC |
| |
Most of the portable AC's are built to be vented through the window. But not everyone can vent it through the window. In such cases, you can vent them through the sliding glass doors, wall or through the ceiling.
Option 1. To see example of how to vent the hose through the WINDOW, Click Here.
Option 2. To see example of how to vent the hose through the WALL, Click Here
Option 3. To see example of how to vent the hose through the CEILING, Click Here |
|
Installation For Regular Portable AC
 |
EASY INSTALLATION SETUP
When you open the package, you can place all the package content on the floor and make sure you have everything before you start. Below is an easy demonstration of how you can setup an air conditioner in few minutes. BELOW IS AN EXAMPLE OF GENERAL SETUP MOST COMMONLY USED WITH MOST OF THE PORTABLE AIR CONDITIONERS. Depending on which air conditioner you choose to buy product design and window kit may vary but setup process will mostly be almost same. Below example is for windows that open vertically, but same method is used for any horizontal opening windows or glass doors. Also, same setup is used for WALL installation.For crank windows you can use the same setup as well but with few additions. Please Note: Not every portable AC comes with a wall kit. Email us before purchasing if you need a wall kit. |
 |
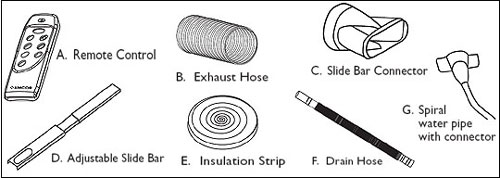
This is your exhaust hose. One end of this hose connects to the AC and the other end of the hose connects to the window. |
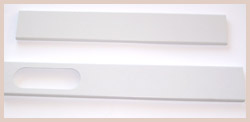 |
This is the window strip which is extendable upto 48 inches. This size of window strip is sufficient for most of the windows. If your window is wider than 48 inches you can always buy an additional window strip for $15-$30. |
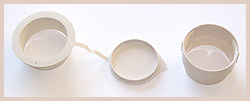 |
This is a wall connector and you need this ONLY IF you decide to install the hose through the wall.You DO NOT need this if you will exhaust the hose through the window.Please mention in your notes with your order if you need this. So we can add it in your package FREE. NOT EVERY PORTABLE AC COMES WITH A WALL KIT, BUT THERE ARE EASIER WAYS TO STILL RUN THE HOSE THROUGH THE WALL USING FOAM SEALER ($5) AND A FLAP THAT CAN BE BOUGHT FROM ANY STORE LIKE HOME DEPOT. Email us before purchasing if you need wall kit with any portable AC. |
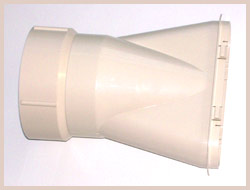 |
This is a connector which is used to connect the hose on one end and connect the window strip on other. |
 |
Now lets get started with installation.
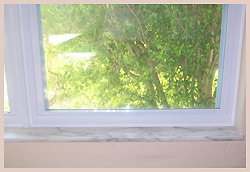
Let's assume this is the window you want your hose to exhaust through. |
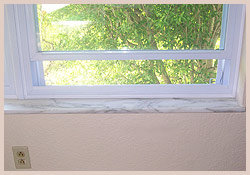 |
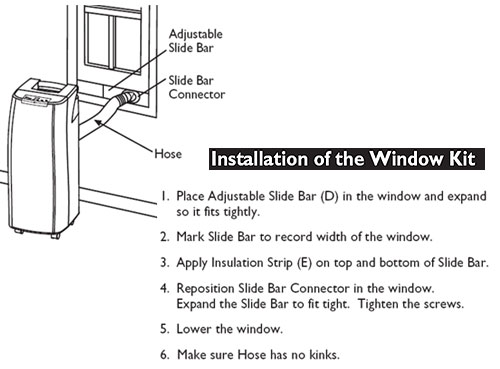
Raise the window slightly, enough so the window strip could be placed in the gap. |
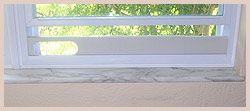 |
This is how you will place the window strip in the gap. |
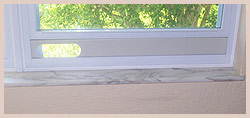 |
Lower the window enough to touch the window strip. Make sure that there is no gap left between the window and the window strip. |
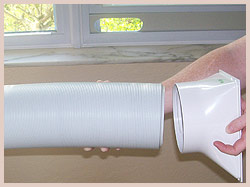 |
Now connect one end of the hose to the AC connector |
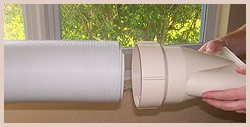 |
Then connect other end of the hose to the window strip connector. |
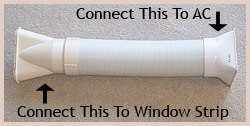 |
Once both ends of the hoses are connected, it should look like this. |
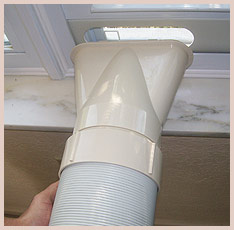 |
Now snap this end to the window strip |
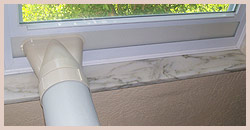 |
Once snapped it should look like this |
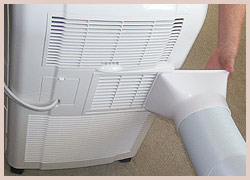 |
Then snap the other end to the back of the AC as per the image on the left. |
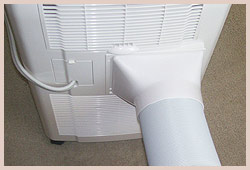 |
This is how it will look once snapped. |
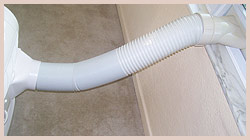 |
Once hose is snapped on both ends, it should look like this.
This is it!!! You Are All Done In Few Minutes!!! |
<< GO BACK >>
FINAL SETUP WILL LOOK SOMETHING LIKE BELOW PICTURES |
|
CONNECTING TO A WALL: IF YOU DON'T HAVE A WINDOW IN THE ROOM AND YOU WANT TO EXHAUST IT THROUGH THE WALL OR CEILING, YOU WILL USE THE SAME SETUP. All you need is a 5-6 INCH hole in the wall, so you could run the hose outside.
YOU CAN RUN THE HOSE THROUGH THE WINDOW, WALL, FLOOR, CEILING, FIREPLACE, GLASS DOOR, CRANK WINDOWS ETC. There are many ways to vent the hose and it is very simple. As long as the other end of the hose is vented out of the room, you will enjoy this AC every summer!
IF YOU WANT A NO DRAIN AC , PLEASE CLICK HERE TO CHECK OUT OUR NEW NANOMAX PORTABLE AC WITH NO DRAIN TECHNOLOGY << GO BACK >>
CONDENSATION - Self Evaporation
All air conditioners have to go through a condensation process. In window air conditioners, because more than 75% of the AC is mounted outside the window, all the condensed water is allowed to drip freely outside. But in case of portable AC, because the AC is inside the room, all the condensed water is stored within an in built tank that needs to be drained. So our Portable AC's use latest technology of Self Evaporation. In this process, AC tries to get rid of most of the water stored in the in built tank by self evaporation, thereby leaving only a small amount that needs to be drained manually which is quiet easy as well. ALL portable AC's have in built water tank which holds water that cannot be self evaporated. Once that water tank is full, the AC shuts itself down and a light blinks on air conditioner's LCD panel indicating it needs to be emptied.
BASED ON THIS TECHNOLOGY AC WILL NEVER LEAK EVEN WHEN THE WATER TANK IS FULL. There is a small rubber cork at the bottom of the AC, ONCE YOU PULL that out, the water just drains out and you can empty it in any pan and restart the AC right away. How often would you need to empty the water tank? Answer is no one can really predict that, as it totally depends on the humidity. It could be once a week or once every few hours. It all depends on your usage and the humidity on that particular day and you can always use the option 2 for continous drainage without having to worry about emptying. Continous drainage system drains the water automatically and you never have to empty it manually and it is very easy to setup as well. See option 2 for continous drainage and option 1 for manual drainage below
Draining a portable air conditioner is easy and takes just few seconds.
DETAILS ON HOW TO DRAIN WATER FROM PORTABLE AC:- |
|
|
STEP 1 : Turn Off the unit, Position the water tray or any tray available flat on the floor under the drain hole. |
STEP 2 : Unscrew the drain knob & pull rubber plug from the drain hole, the condensed water will drain out automatically. |
SECOND OPTION FOR CONTINOUS DRAINAGE
|
|
OPTION 2 : You can also attach a drain pipe to the air conditioner for continous drainage as above. |
You can easily attach an extension to the water tube for longer drainage setup, if needed. |
<< GO BACK >>
|
Installation for Auto Drain Portable AC (NanoMax Technology)
EASY INSTALLATION SETUP
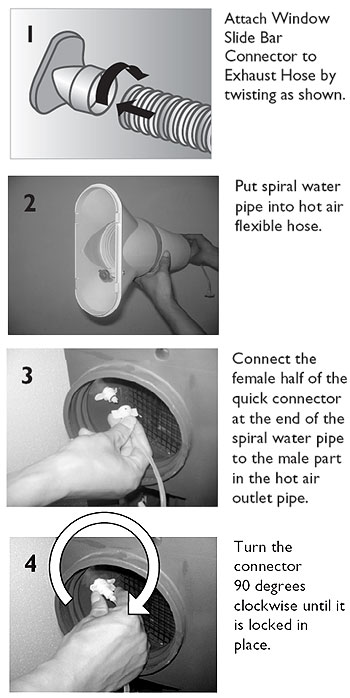
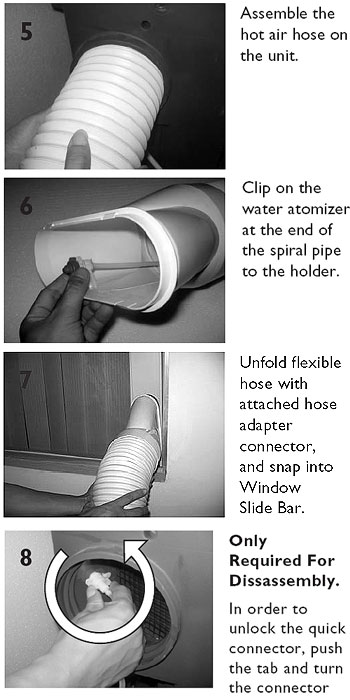
<< GO BACK >>
|
|


![]()
![]()